Until now, there have been no convenient tools that would allow editing the BIOS time of the AMD RX5700 graphics card. Temporary editing for AMD worked very well in the past and increased mining speed by 10%. The same is possible now with the RX5700 GPU. We checked this, and it works fine, we increased the mining speed from 52-53 mh / s to 57-59 mh / s.
This is very important, especially when the yield is very low. Here are the steps we took:
Required Tools:
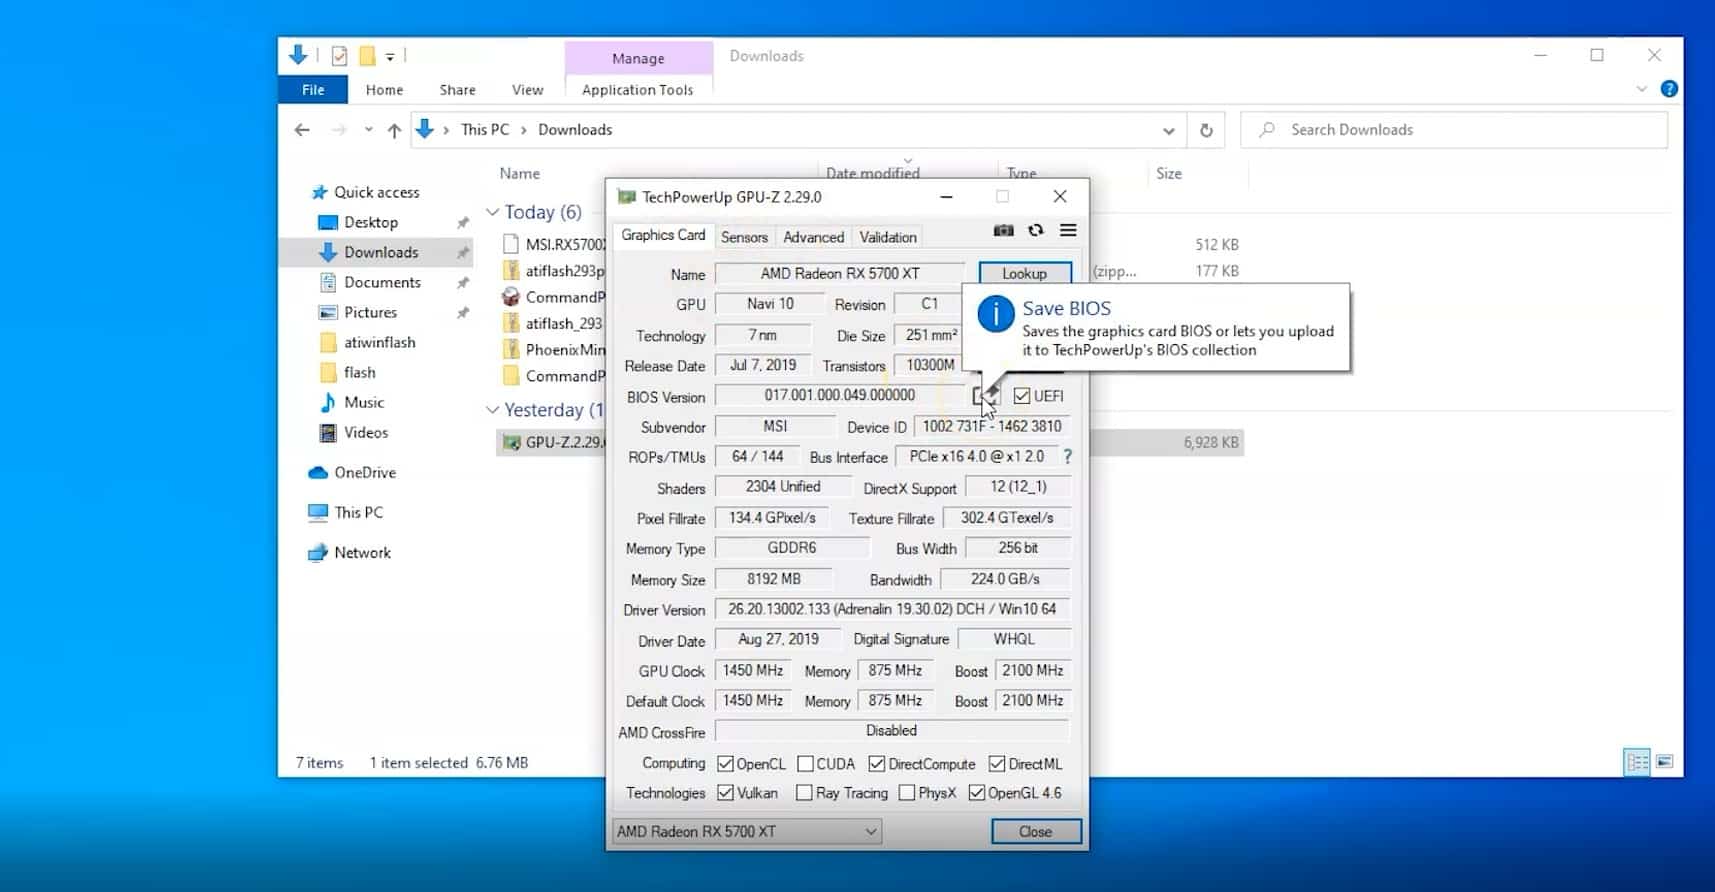
✔️GPU-Z - https://www.techpowerup.com/gpuz/
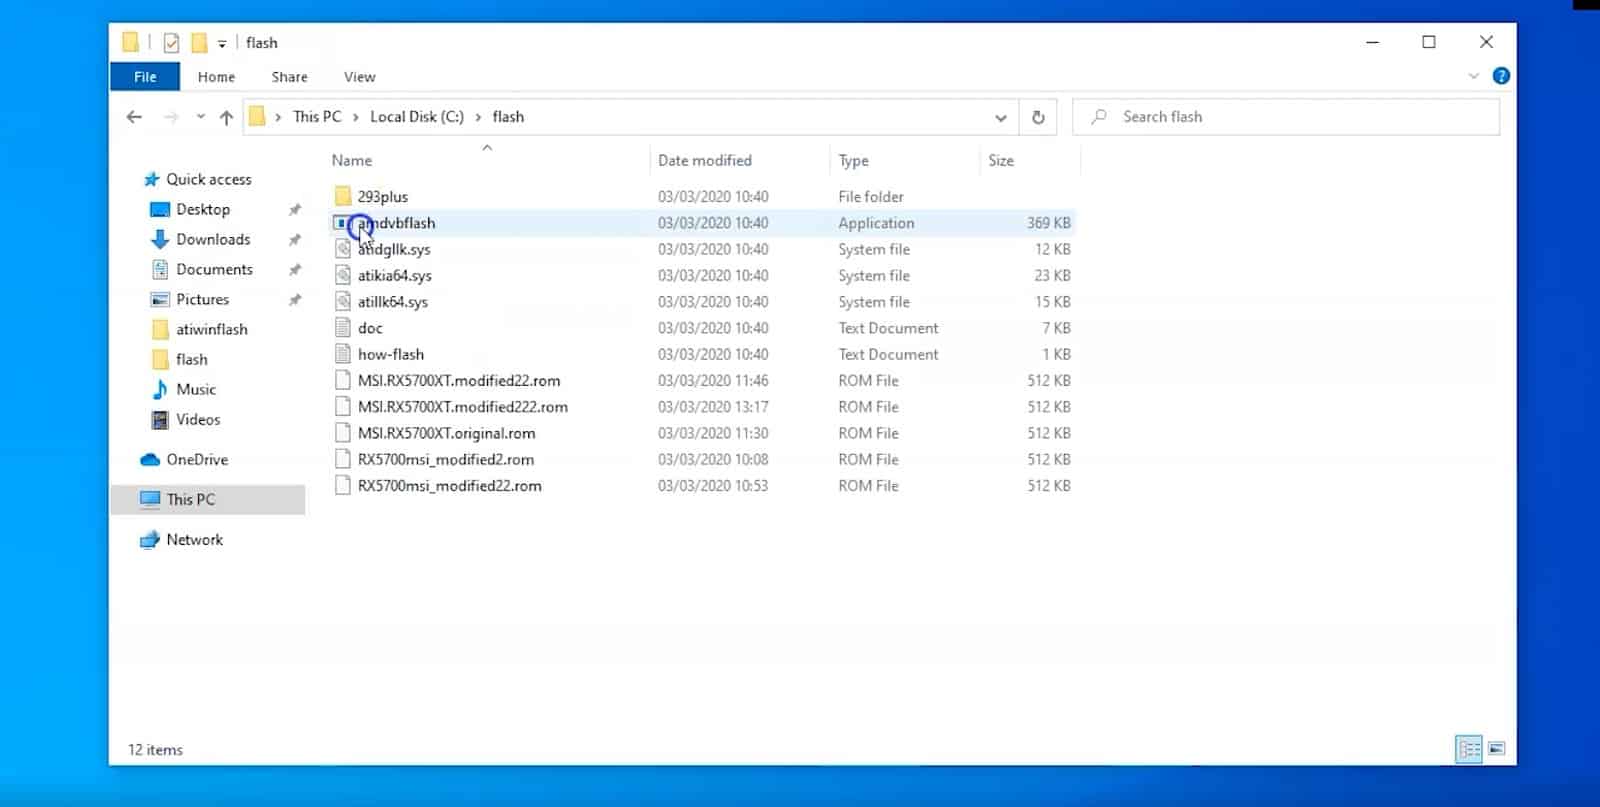
✔️Flitter - atiflash
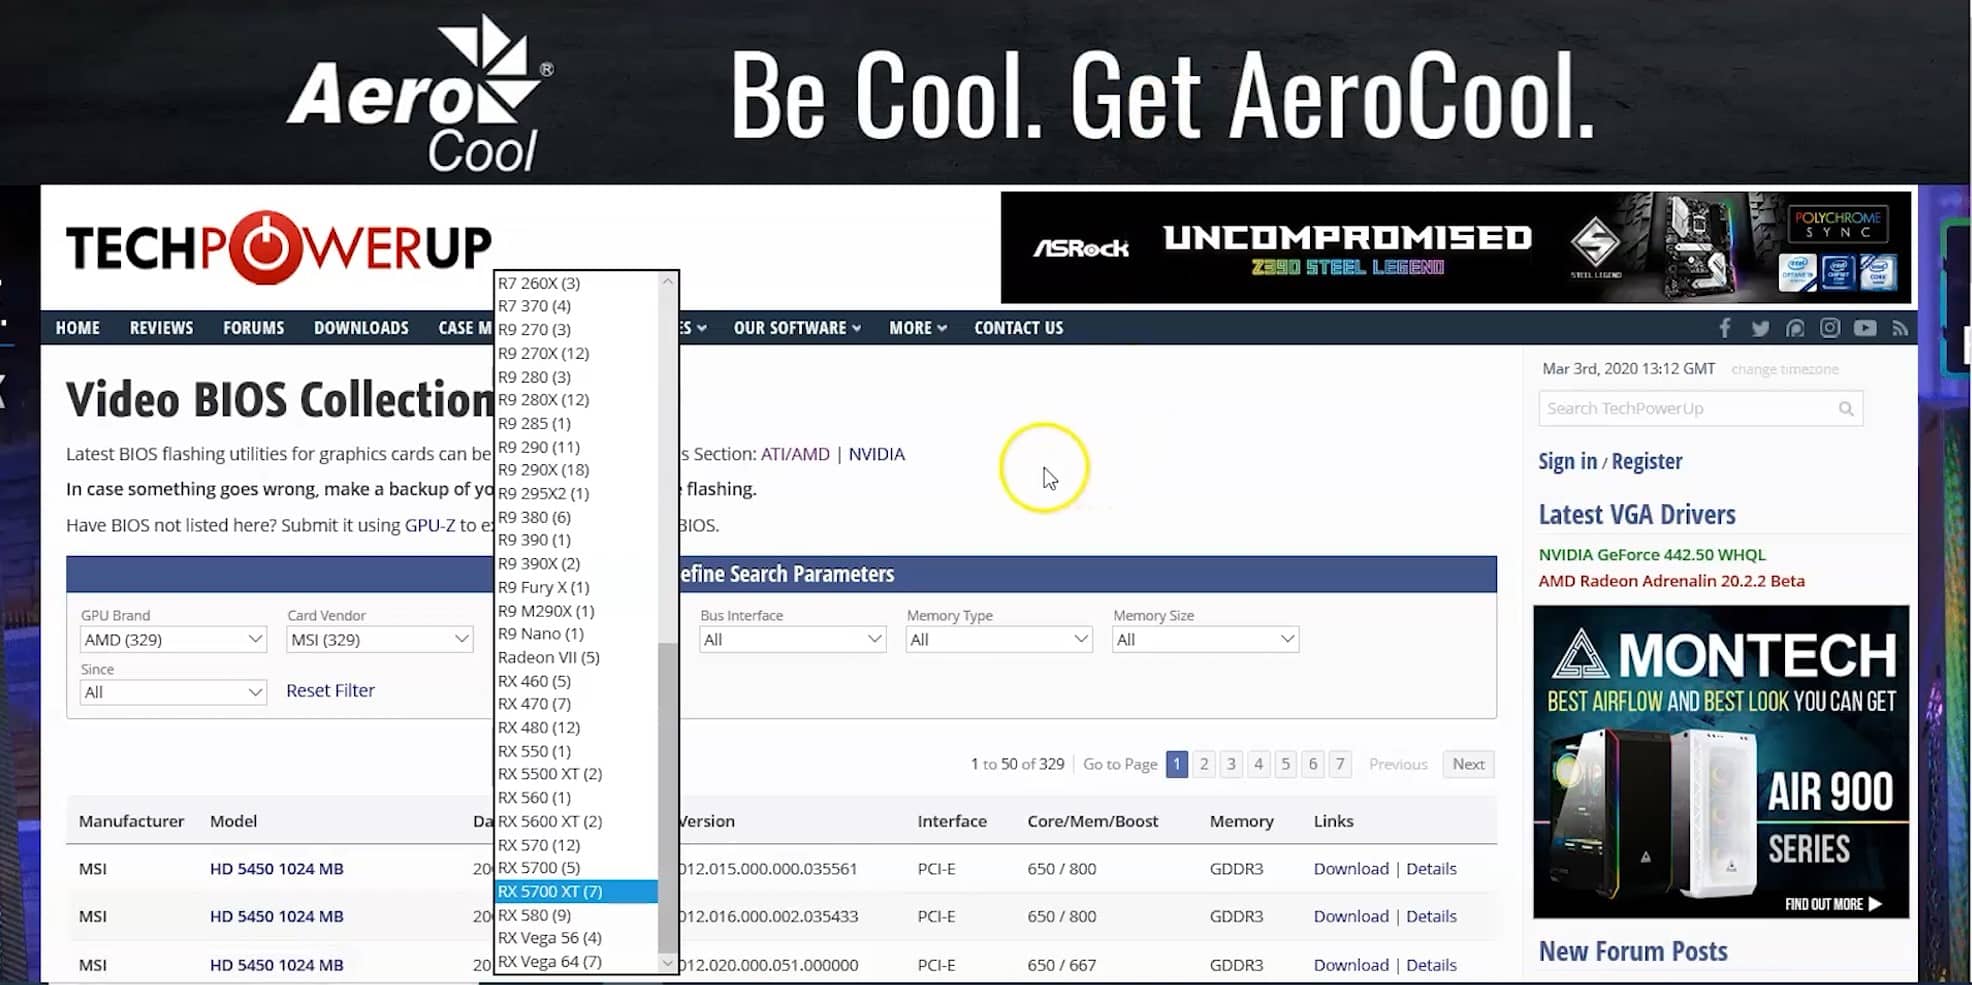
✔️GPU BIOS - https://www.techpowerup.com/vgabios/
So for testing, we had a 2x RX5700 non-XT version. We edited the time and also updated the non-XT version to the XT.
Follow the steps:
- Save your BIOS GPU for backup with GPU-Z
- Extract the flasher to your C drive:
- Download the original version of BIOS XT from the GPU BIOS collection from https://www.techpowerup.com/vgabios/
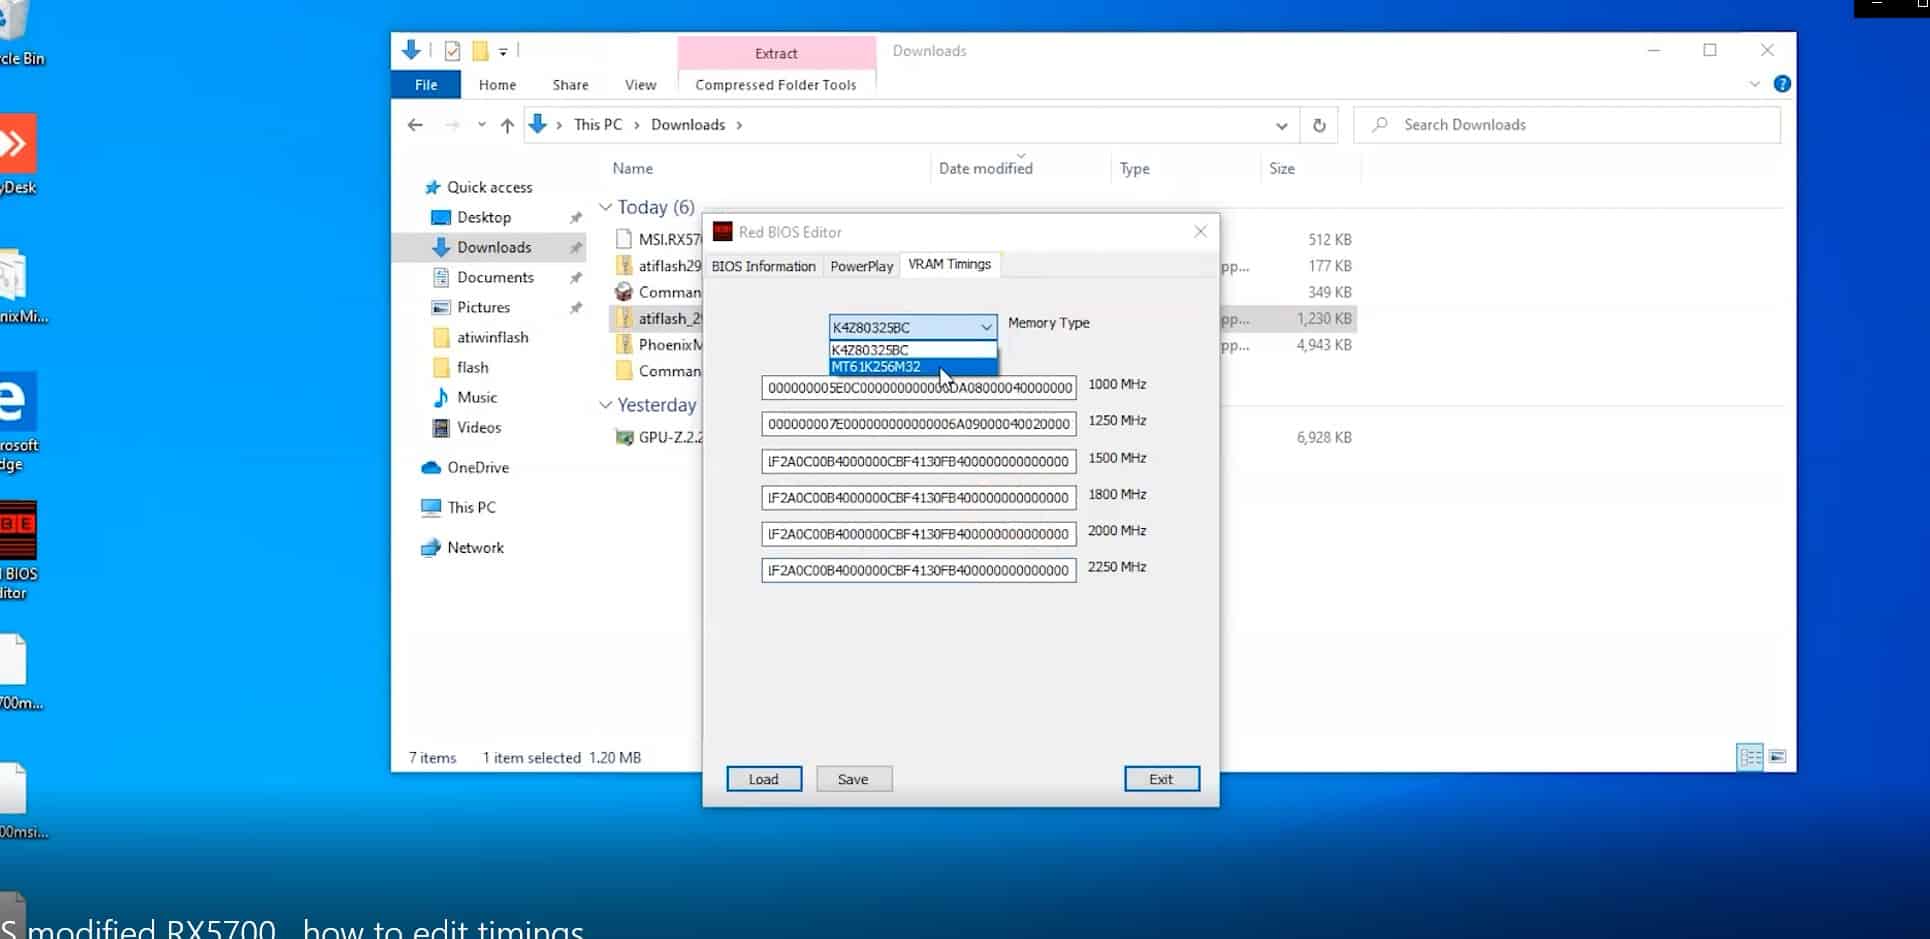
- Open XToriginal.rom in the BIOS editor, edit the timings and save the BIOS in the flasher folder. We copy the timings from 1500 MHz to lower 1850 ... etc. (Similar to 570 GB RX4 cards). These cards have 2 bios, so edit them both, after each editing you need to save. This tool does not allow editing 2 bios simultaneously.
- Now you need to load them onto your graphics card. Open a command prompt as administrator. Go to the flasher folder (cd => cd flash => amdvbflash -i), this will give you information about the GPU connected on your system.
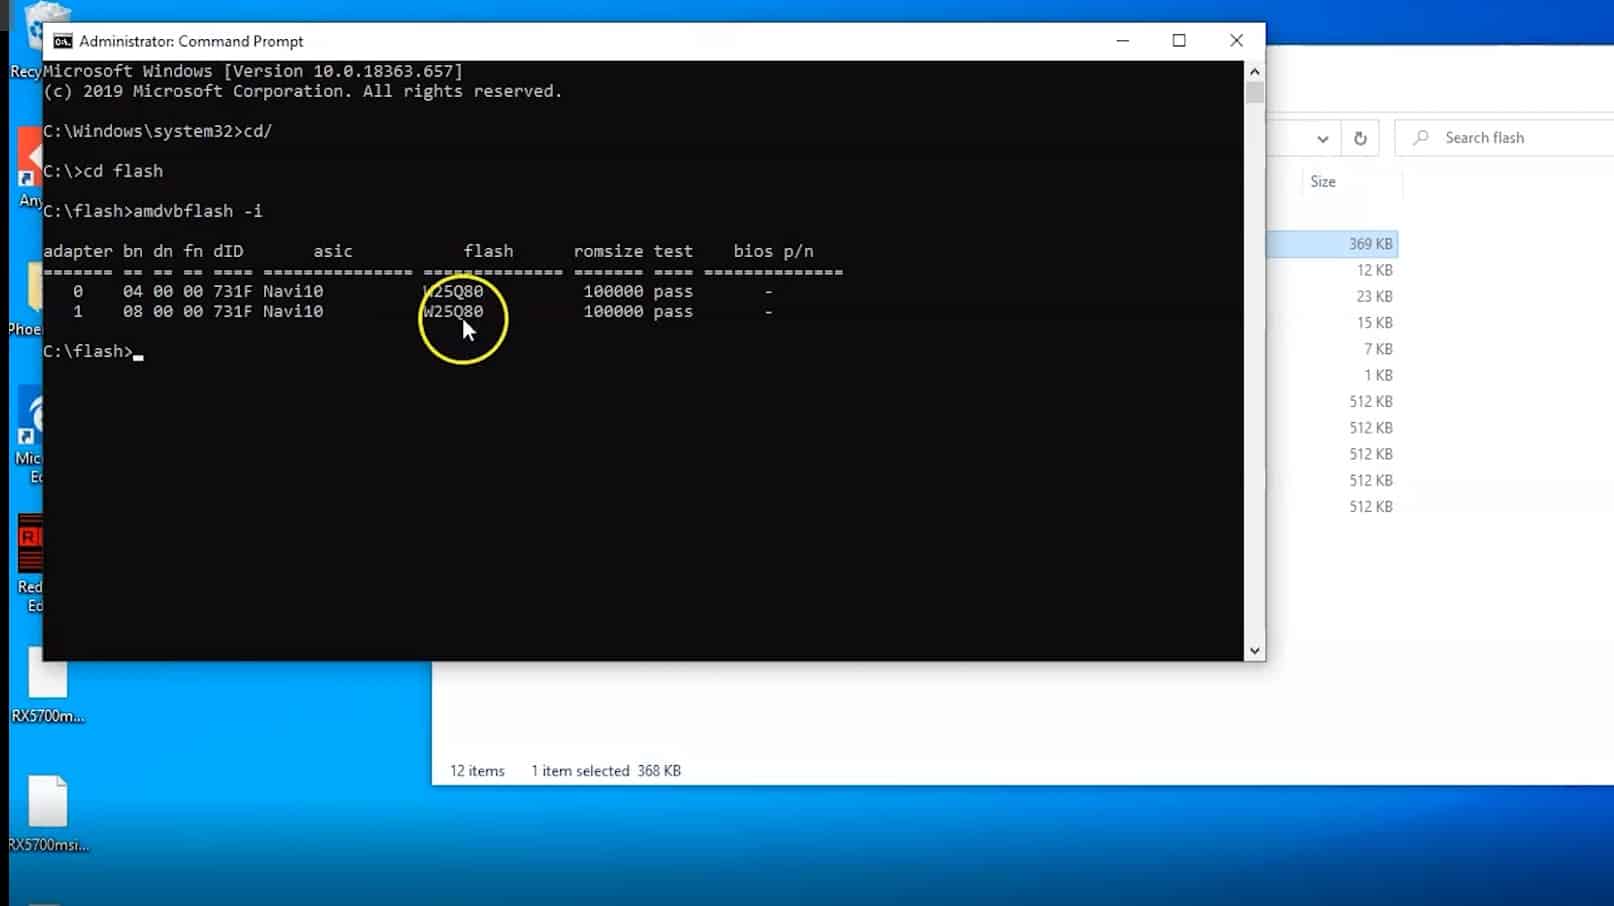
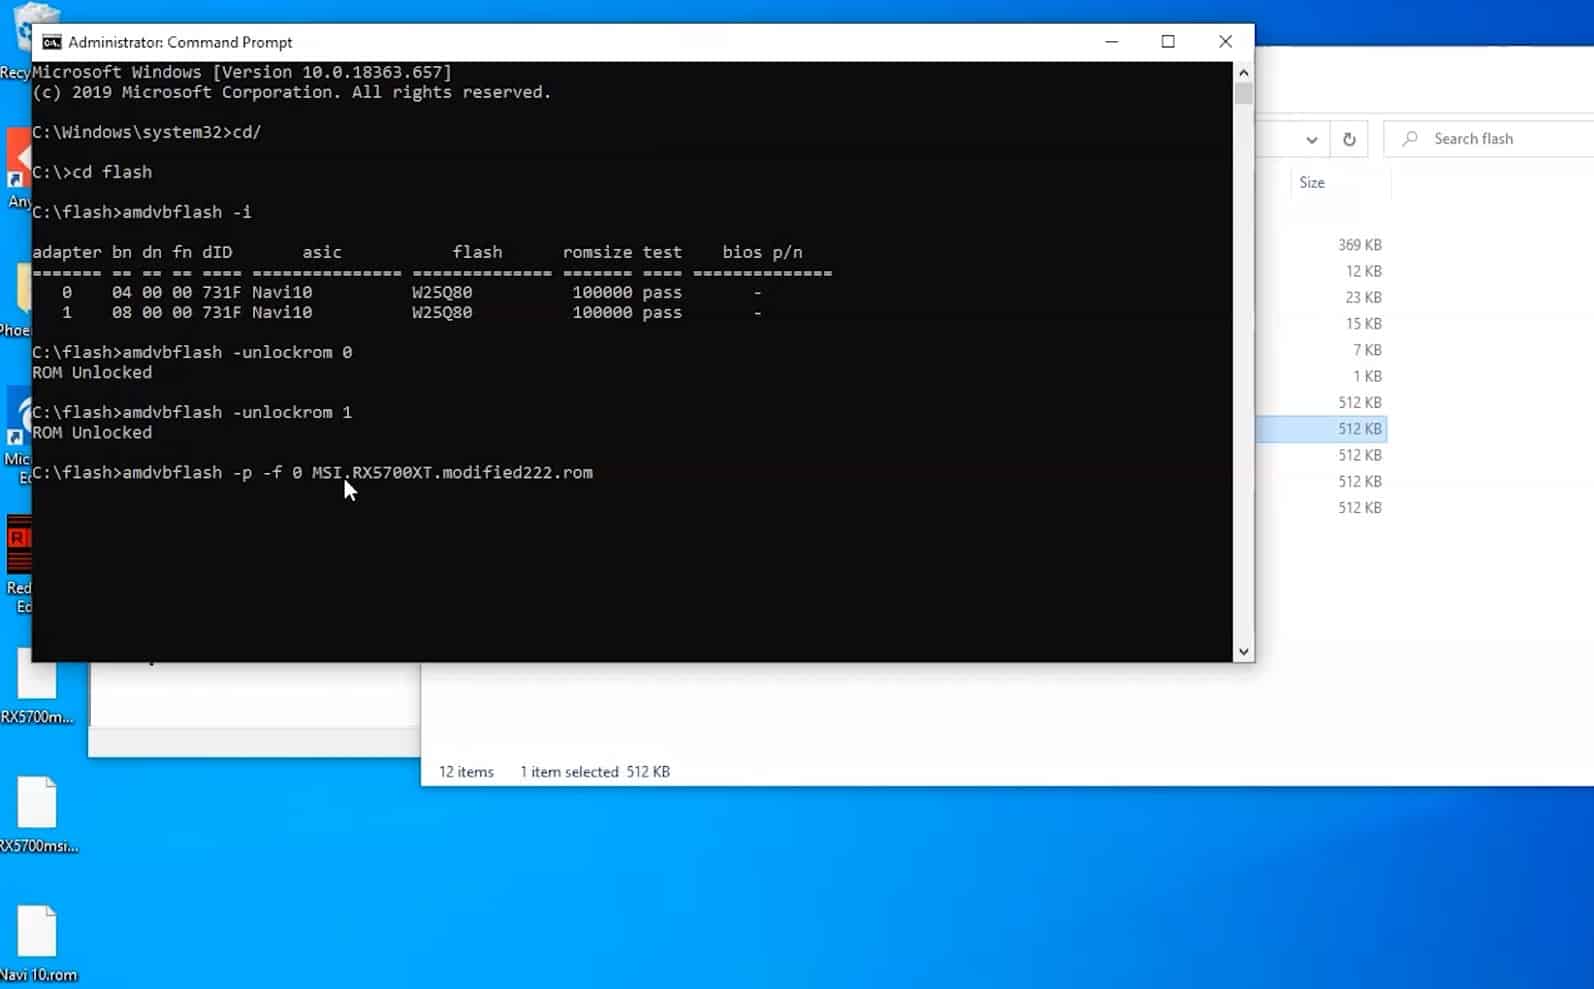
- Then you need to unlock gpu ROM to load a new BIOS type in cmd (amdvbflash -unlockrom 0) 1,2,3 if you have more than one gpu

- And finally upload the new BIOS to your GPU, type in cmd (amdvbflash -p -f 0 newBIOS.rom) newBIOS is your new bios with .rom extension
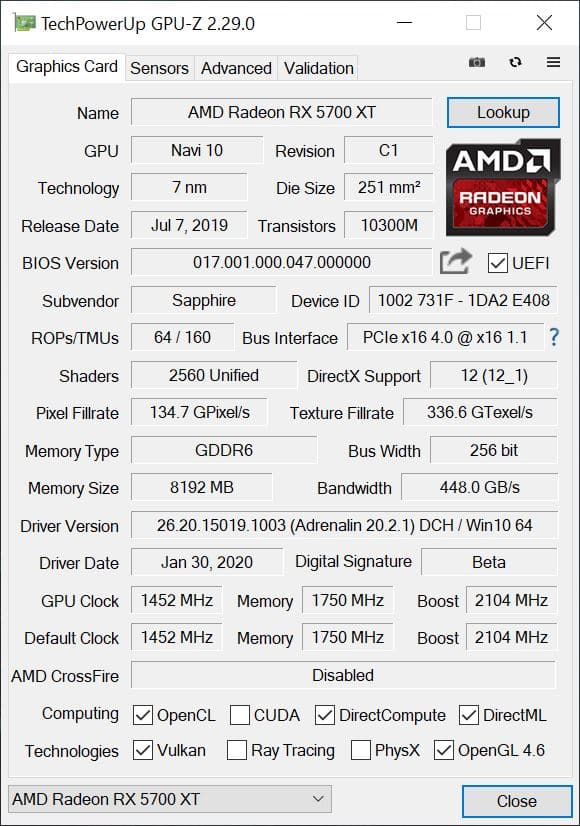
After flashing, the computer must be restarted. We can already admire the new data in GPU-Z. In this case, I set the clock frequency a little higher. Now the value is no longer 1925 MHz, but 2104 MHz. In real terms, the card reaches 2050 MHz with proper cooling.
It's simple, reboot your system, and your hash rate should increase. If you have done everything, as we explained here. Other firmware versions will not work, links for downloading the necessary programs are indicated at the top of the post.
Video (eng):